Recipe For Potassium Rich Soup For Winter or Cleansing Diets

Vegetarian Lentil and Mung Bean  Potassium Broth

This is a very tasty and mineral-rich  soup.  It is a great thing to make in a large pot-full, so that you have plenty for the family, and for those days when you are eating only potassium-broth as part of your detox-cleansing regime.

Really, you can put any vegetables that you have on hand into a vegetable potassium broth.  One of the standard ways of making a potassium broth  for a fast is simply to use potatoes and onions, and celery:  This is simmered gently for an hour, then left to cool.  If you are fasting, then the liquid is strained off and the cooked vegetables are discarded.

But in this  potassium rich soup recipe, we leave the vegetables in the broth. Instead of a fast, you can give your digestion a rest by having days when you eat only potassium soup.  Once you have made it, you can eat a helping whenever you feel hungry. Potassium-Rich soup is an alkaline food which is very nourishing to the nerves, so it is a healthy thing to snack on.

Potassium Broth is also a good hearty  starter to a meal on those cold winter nights, to feed a hungry family.

Recipe For Lentil and Mung Bean Potassium Broth:

You need a very large soup pot for this recipe. Use a pot which will hold around 4 to 6  litres.

1 cup mung beans

1 cup of brown lentils or adzuki beans

3-4 cups of chopped celery.  Use some of the green tops, as this is where most of the potassium and other nutrients are found.

2 chopped onion

1/2 a leek chopped up.

2 carrots.

2  cups of chopped parsley picked from your garden.

2  cups of chopped coriander preferably picked from your garden.

3 cups of young silver beet or spinach, picked from the garden.

1/2 a medium sized pumpkin or squash.

2 teaspoons sea salt.

1 teaspoon red paprika powder.

In your big stainless steel pot put the mung beans and the lentils or adzuki beans.  Half fill the pot with water.  Soak for an hour, then cook  the beans and lentils for half an hour on the stove.

After the beans and lentils have cooked for a bit, put in the pumpkin with the chopped celery, the leek,  the chopped carrots, and  the onions.

Top up the pot with water to about 3/4 full.  Simmer all for around half an hour.  Then add the rest of the ingredients – the parsley and the coriander and the paprika pepper.

Now simmer the soup very gently for around another hour.

Use a potato masher to roughly mash up the pumpkin  and the carrots.

Your broth is now ready.  It is a good idea, unless you need all of this soup mixture to feed a large group, to  take some of the soup off to cool, to put into the freezer.   It freezes very well so long as it is put into  well-sealed containers.  Add a little more water to the remaining soup in the pot if needed, and perhaps a little more salt and pepper to taste.

Herbal Wine Recipe For Home Made Marigold Flower Wine

Marigold Wine from the Chrysanthemum segetum: As a healing herbal medicine, Culpeper says of the Marigold  that it  is “good in all kinds of fevers;  it promotes sweat, and is frequently used to drive out the small-pox and measles; it also helps the jaundice.”

DSCO 1673

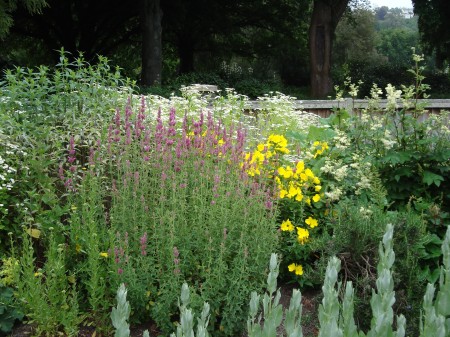
Herbs For Healing:  Photo taken at Dunedin Botanical Gardens by Merrilyn on Holly’s camera, December 2012.

Marigold Flower Wine is a  herbal wine which can be used as a medicinal agent to treat the conditions which Culpeper mentions,  as well  for culinary purposes.  It can provide  a unique and  aromatic  quality to a meal.

Marigolds, which are also called Calendula, have many healing properties.  The leaves and the flowers of the Calendua plant can be used in herbal medicine, but in making Marigold flower wine, we only use the fresh orange-yellow petals of the flower.

To Prepare  The Marigold Wine:

Simmer 3 lb of white sugar in 8 pints (4 litres) of water for five minutes.

When the syrup has cooled, pour it into a glass or china, or plastic container and add 8 pints (4 litres) of  freshly picked marigold petals.

Add the juice of 2 large lemons.  With a vegetable peeler, strip off some of the yellow lemon peel and add this to your wine mixture.   Do not use any of the white pith in your wine, as it will make it bitter.  Use fresh lemons from your garden, and not commercial fruit which has a wax sprayed onto the fruit to preserve it.  Bought organic lemons should be OK, as this wax shouldn’t be used on organic fruit.

Crumble in 1 oz of fresh wine yeast.  You can use baking yeast, but wine yeast should give a better result.

Leave for four days, stirring twice daily with a sterilized wooden or plastic spoon. Make sure that your wine is covered and that no ants or sand flies can get into your wine mixture.  Sandflies will cause it to turn to vinegar. It really is best to apply a fermentation lock right from the word go, as this prevents insects and vinegar bugs from attacking your wine. Another tip –  Best not to use metal utensils in wine making, except for the initial simmering of the sugar and water.  Use glass, china, plastic or wood for the spoon.  It is essential to use  sterilized equipment, as this helps prevent your wine from becoming vinegar.

After four days, strain off the liquid and put into another clean glass or stone-china vessel.  Put on the fermentation lock, put the wine vessel in a cool spot,  and leave it to work  until fermentation has ceased.  Leave to settle for another 14 days after fermentation has stopped.

Now-Put 1/4 lb of sugar in a small saucepan.  Add 1/2 pint of boiling water (about 1 and a half cups).  Stir over low heat until sugar has dissolved and the syrup has reached simmering point.  Allow this to cool completely, then stir into the marigold flower wine.

Bottle in clean, dry,  sterilized bottles.  These can be heated up gently in the oven for half an hour, on a low temperature of around 100 C.  This will sterilize the bottles and dry them.  Let the bottles cool before bottling the wine.

Cork with new, clean corks and leave your marigold wine to mature for 6 months before using.  This should produce a light sparkling cider coloured  herbal wine which has all the medicinal qualities, and the  delicate flavour of marigold.

How To Make Home Made Pasta With Eggs and Flour

Recipe For Fresh Pasta:

This recipe uses wheat flour and eggs as its basic constituents.  It is not gluten free, because of the wheat flour.

Home made pasta with eggs is  a high protein food which is very delicious.  You can be sure your pasta does not have any additives such as preservatives, artificial flavourings,  or colourings,  if you make your pasta at home:   That is, provided your flour is preservative-free.  If you use organic flour,  and organic olive  oil, as well as organic free-range eggs,  then your home made pasta will be more or less organic.

Home made pasta with eggs is not so hard to make.  It just takes a little time, that is all.  You have to allow time for the pasta to dry once it has been made and rolled out.  The drying out of the pasta improves the flavour, as well as preventing the pasta from breaking up once it is put into boiling water to cook it.

The ingredients for home made pasta with eggs are as follows:

250 gms organic wheat flour

1 teaspoon sea salt

1 tablespoon of olive oil

Two and a half eggs:  The half egg is important.  Break the third egg into a cup, give it a whisk, then divide the egg into two.  Use only half of the third egg in your pasta.

1/2 teaspoon dried oreganum (optional)

1 tablespoon of cold water

Sift the flour into a mixing bowl with the salt and oreganum.  In another bowl mix the eggs, water and olive oil together.  Make a well in the middle of the flour and pour in the liquid.  Work the flour into the liquid.  Use more flour or water as needed to make a soft pliable dough.  Knead the dough on a floured board for around five minutes.  Return the dough to the bowl, cover with a clean tea towel  and leave for an hour.

After an hour, divide the dough into two lumps.  Roll  out each section thinly on a floured board, and leave again to dry for another hour or so.  In Italy, home made pasta is hung over the backs of chairs, and on broomsticks, and left to hang until it has dried sufficiently.

Now cut the pasta dough up into strips and leave again for about 2 hours.

Now your pasta is ready to cook in the normal way:  Boil your water first, add a dash of salt, and drop the strips of pasta into the boiling water.

To Make Home Made Green Spinach Pasta:  Follow the recipe as above, but instead of the water, add three tablespoons of cooked mashed spinach.  Use a little more water or flour as needed, to bring the dough to a soft pliable consistency.


Wheat-free Dairy-free Swedish Rye Bread

Dark, Long-Keeping Rye Bread:  This is a dairy-free recipe  which I published in a wee health book in the early 1980’s.  I used to make  it frequently, especially if people were coming over for lunch, or we were going on a picnic. It was a real favourite.

Wheat free Dairy free Swedish Rye Bread is a great bread recipe for those who can tolerate rye flour.  It does not contain any wheat flour, although it is not gluten-free, because rye flour contains gluten.  It is rich and dark and tasty, and it keeps well.  It will keep for a week or two if you keep it in the fridge.

Natural Iron Tonic: The molasses in this rye bread make it a wonderful iron tonic.  My children were never too keen on eating straight molasses as a tonic, but they did enjoy this rye bread which has a high molasses content.

Recipe for Dairy-free Wheat-free Swedish Rye Bread

2 tablespoons dry yeast granules

2 tablespoons of olive oil

1 cup  soy milk

Grated rind of one ripe orange

2 tablespoons apple cider vinegar

1/2 teaspoon sea salt

3/4 cup molasses

4 cups of rye flour

1 cup soya flourSprinkle the yeast over 1/2 cup of warm water and let sit for 10 minutes.  Warm the milk slightly and add this to the yeast mixture with the olive oil.

In a bowl, put the orange rind, salt, vinegar, and the yeast mixture.  Gradually stir in the rye flour and the soya flo9urs.  Knead on a floured board until it has a nice pliable texture.  Add a little more flour if necessary.  Grease your loaf tin with olive oil or butter, and put in the dough.

Let the rye bread rise for 45 minutes to an hour in a warm place, such as the hot water cylinder, or the side of the stove.

Pre-heat the oven  to 200C while the bread is rising.

Bake for 20 minutes at 200C, then turn the temperature down to 180C and cook for another 40 minutes.

Remove the bread from the tin when it is cooked, and allow to cool on a wire tray.

This bread is best left for a day or two before cutting and eating.  It will cut better if it matures a little, and the orange flavour will permeate the bread, which makes it very delicious.

Cornmeal and Millet Bread Recipe – Wheatfree and Glutenfree

Gluten Free Bread Recipe.  This is a  meal on its own.  It is a protein-rich bread, and is  completely gluten-free and wheat-free.  It makes a marvellous, tasty  addition to a meal with a good big salad, cooked greens,  and rice or potatoes.  It is great nutritious and tasty bread to include in school lunches, and for picnics.

The Recipe for Gluten Free Wheat free Cornmeal Bread:

60 gm of fine yellow cornmeal, or maize flour

60gm fine millet

2 tablespoons of soy flour

2 tablespoons sesame seed

1 heaped teaspoon of baking powder

2 tablespoons melted butter or olive oil

1 grated carrot

2 tablespoons chopped parsley

1/2 onion chopped finely

3 free range eggs

1/2 cup boiling water

1 teaspoon honey

1/2 teaspoon sea salt.

Pre-heat the oven to 200C.

First dry toast the soy flour in a dry frying pan for just a couple of minutes.  Lightly brown it but do not burn.  Keep stirring as it toasts.

Add this to the millet and cornmeal flours with the baking powder

Separate the eggs.  Whisk up the whites to form peaks.

Melt the honey and salt in the boiling water.  Add the butter or olive oil.

Add the grated carrot, the diced onion, parsley, the egg yolk, the honey and water mixture which has the oil or butter in it, to the flours.

Fold in the stiffly beaten egg whites.  Do not stir too much.  Turn the mixture into a greased loaf tin, or a greased square or round  glass pyrex dish. Sprinkle the sesame seeds over the top.

Cook for around half an hour, or until it has browned nicely.   I found that the cast iron frying pan made a great dish for cooking cornmeal breads such as this one.  Be careful not to hold the handle of the fry pan when the bread comes out of the oven, and keep it away from children until it has cooled.

It can be served with a home-made gluten-free tomato sauce:

Simply lightly stew two or three tomatoes with the remainder of the onion from the recipe above, chopped finely,  a little salt, 1 teaspoon honey, and just a tad of water to give a sauce-like consistency.  Add some fresh chopped basil.  Spoon over your cornmeal bread, or serve alongside.